
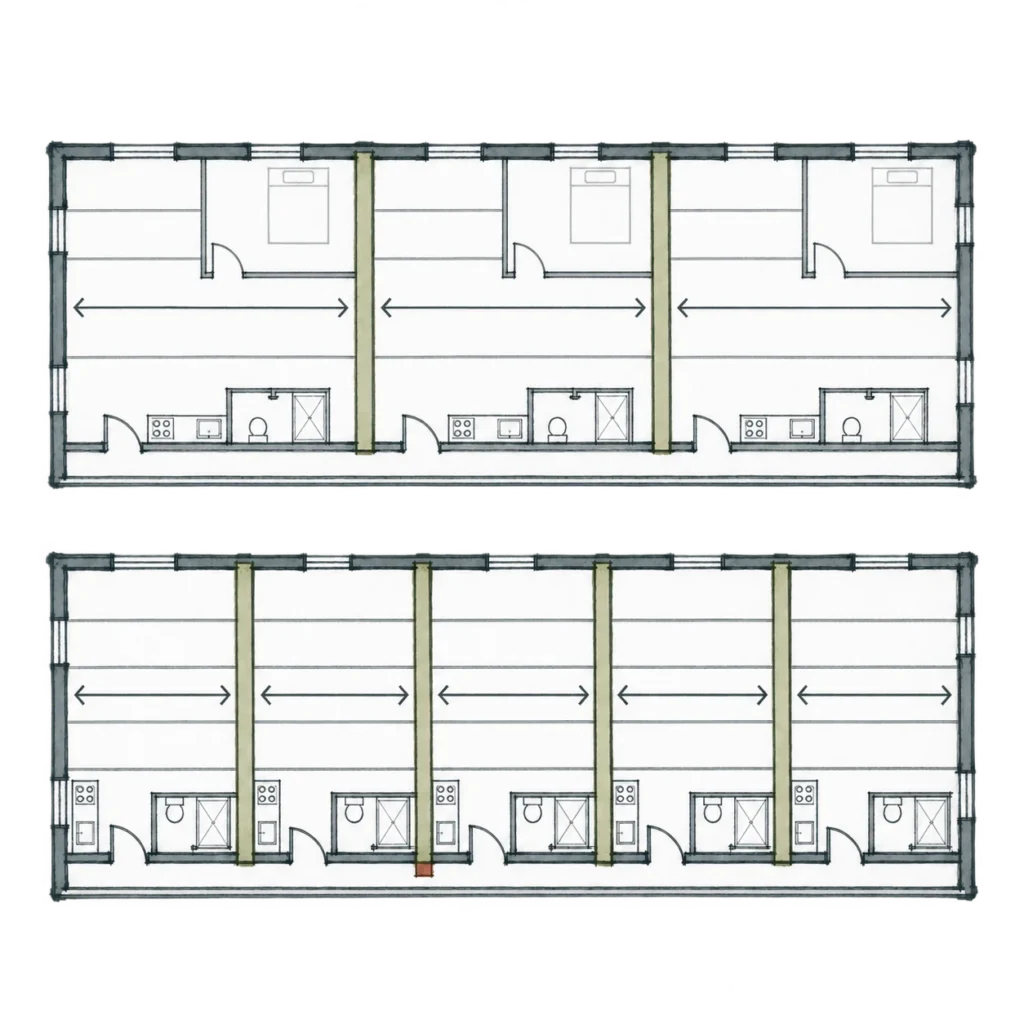
When a building fits more studios, micro-units, or junior one-bedrooms into the same footprint, it buys more unit doors, kitchens, baths, and demising walls per square foot. In wood-frame construction, the demising wall is often among the most expensive structural wall assemblies because it must also meet fire and acoustic requirements. Construction cost per square foot can rise compared with a similar building with a larger-unit mix. Yet the cost per dwelling can be lower because the building holds more units. Both measures matter to a workforce housing pro forma.
The denser wall pattern can help structure offset some of that added cost. If unit layouts and demising walls stack floor to floor, those walls can serve as regular bearing lines. Trusses may span between them without relying on partitions within the apartments. Shorter spans may also allow shallower trusses in some layouts. The opportunity depends on a repeated, buildable stack; a plan full of shifted walls and transfers can spend the potential savings before construction starts.
1. Compare cost per square foot and cost per unit
Ask the team to compare the small-unit mix with a realistic larger-unit alternative using the same site, building area, construction type, and scope. Keep the two cost measures visible:
Per gross square foot. Count the added length of demising walls, plus unit doors, kitchens, and baths. These can raise the cost even when individual apartments are smaller.
Per dwelling. Divide the whole-building cost by the actual unit count. More dwellings can lower this measure even while cost per square foot rises.
Structural offset. Show the truss, bearing-wall, and transfer allowances separately. Do not credit a framing saving until the stack and spans have been tested.
Use both measures to confirm that the added cost of more unit-level scope is understood and that the framing study is capturing the savings available from repetition.
2. Make the unit stack do structural work
Overlay the unit separation walls on successive floors, then trace them to the first level with a different use. Identify which demising walls can be consistent bearing lines and which are interrupted by entries, openings, shafts, or a different plan below. Keep partitions within the apartment non-bearing where the span strategy allows, so a kitchen or sleeping-area partition does not become an accidental structural constraint.
Compare bearing at every demising wall with bearing at selected walls. The first may shorten truss spans; the second may reduce bearing details and support conflicts below. Neither is automatically cheaper. Check how many lines truly stack, what each wall assembly requires, and whether a transfer is needed when the support reaches parking, a lobby, or an amenity level.
3. Test whether shorter spans buy useful depth
Draw a section through a typical unit, corridor, and demising wall. Ask for the actual truss spans and preliminary depths under each bearing pattern. A shorter span can permit a shallower truss, but loads, deflection, vibration, fire and acoustic assemblies, and MEP routes still govern the floor zone. Compare the achieved ceiling height and service path, not just the member depth on a framing sketch.
4. Compare three framing responses
Bear at most stacked demising walls
Pros. Short, repeated truss spans can simplify framing and may reduce truss depth. Partitions within units can remain non-bearing.
Cons. Each bearing line needs a reliable stack and a workable landing below; more supports can constrain the nonresidential level.
Cost and time. Repetition may speed typical-floor work, but price the bearing details and any lower-level transfers alongside the truss saving.
Bear at selected demising walls
Pros. Retains a regular system with fewer bearing lines and may ease parking, lobby, or amenity coordination.
Cons. Longer trusses may add material or depth, and fewer walls carry larger reactions that need coordinated details.
Cost and time. Compare the repeated truss premium and ceiling effect with bearing and transfer work avoided. Confirm truss design and lead time before scheduling.
Accept local transfers where the stack breaks
Pros. Protects the efficient residential pattern when a limited number of ground-floor spaces need to stay open.
Cons. Transfers add depth, load-path changes, connections, and construction coordination at the transition.
Cost and time. A few planned transfers may be worthwhile; many offsets can erase the framing advantage of stacking. Price their sequence and downstream effects.
5. Protect the repetition before it disappears
Before design development, record the typical unit widths, bearing demising walls, truss direction and preliminary depth, and the exceptions that need a transfer. Mark which unit partitions may move and which walls must stack. If unit mix, entries, or lower-level layouts change, rerun the support overlay and both cost measures. The savings come from repetition that survives the full building, not repetition that appears only on one typical floor.
Further reading
ULI, The Macro View on Micro Units (2015 cost and planning context)
WoodWorks on non-bearing partitions below floor trusses
WoodWorks on interior wall structural, fire, and acoustic coordination